I love a juice, it’s such a good way to get nutrients into your system fast and get hydrated at the same time. Imagine having to eat and fully digest all those vegetables, that would take quite some time. Green juices are known to be… Read more
All posts tagged “vegan”

Raw coconut & vanilla creme brûlée
We are finally in June, the time of strawberries and other summer fruit and vegetables- best season for eating your ‘rainbow’ as we always like to recommend to our clients in teaching clinic. It’s such an easy way to remember to bring variety and lots… Read more

Cauliflower rice mushroom & asparagus risotto with macadamia cheese
April is always a bit of an ‘on/off’ month, it feels like nature is going through rehearsals in preparation of the great summer performance. Despite the cold, I love this time of the year with longer light filled days , blossoming trees and little tender… Read more
 Cauliflower rice mushroom & asparagus risotto with macadamia cheese
Ingredients- Serves: 3-4
1 large head cauliflower, chopped into smaller pieces
400 ml of chicken or vegetable broth
2 -3 tbsp of dried porcini mushrooms
400 g of cremini mushrooms- sliced
200 g of green asparagus
2 cloves of garlic, finely chopped
1-2 medium sized shallot finely chopped
1 tbsp coconut oil, ghee or butter for those who can tolerate it
1 tbsp ghee, butter or cold presser olive oil
1 bunch of fresh flat leaf parsley- finely chopped
3-4 twigs of thyme ( optional)
1-2 tbsp fresh lemon juice
150g of rocket
Himalayan or sea salt and freshly ground pepper
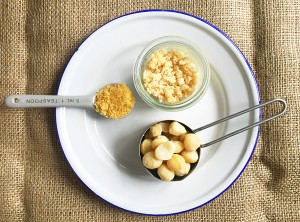
Macadamia cheese
1 cup of macadamia nuts
1-2 tbsp of nutritional yeast
Method:
Start preparing the stock in a pot with boiling water, add the Porcini mushrooms, stir well and simmer for 10-15 minutes.
For the macadamia cheese you will need an electric or manual coffee & spice grinder. Simply transfer nuts and nutritional yeast into the grinder and grind until you get a grated Parmesan like texture. For a more cheesy flavour add more nutritional yeast. Transfer the mix into a glass jar, close the lid tightly and store in the fridge.
Wash rocket and leave to dry in a sift. Next, finely chop garlic and shallots, then wash and finely chop parsley and set aside in separate bowls.
The vegetables are best all prepared in advance, so they are ready to be used for each step. The easiest way to do this is to have a bowl ready for each vegetable and herb to keep them separate and ready to go. For the cauliflower, remove the big green outer leaves, then cut the whole head (including the middle stalk) into smaller similar size pieces, wash, drain and set aside. Next, wash and cut asparagus into 1 inch pieces (cutting off any dry ends first), then wash the mushrooms and depending on size just slice and for bigger mushrooms cut into quarters before slicing and set aside.
Now melt ghee or coconut oil at medium heat in a medium sized frying pan, add shallots and garlic and sauté until soft and lightly browned, then add the mushrooms. Keep stirring until mushrooms start producing a lovely and fragrant juice. Now add 1-2 cups of parsley and the freshly washed twigs and leaves of thyme, sauté for a couple of minutes, then add a squeeze of lemon juice and salt and pepper for taste, turn up the heat one more time ,cook for 1 minute before taking it off the hob, cover and set aside.
Next, blitz 1/2 the cauliflower pieces in a food processor until you get a rice like consistency, transfer into a big bowl before blitzing the remaining cauliflower pieces. Raw cauliflower rice is ideal for freezing, so if you feel you have too much, simply transfer into a jar and put in the freezer for your next risotto.
Re-heat the stock, you can either leave the dried and now soaked mushrooms whole or take them out to cut them into smaller pieces and return them to the stock. Once the stock has come to a boil, add the cauliflower and asparagus and simmer at a lower heat for 5 minutes, the texture should remain slightly crunchy.
Drain off any excess stock, but leave enough to give some moisture to the dish. Keep the excess stock in a jar, it can be added to the risotto if needs be or kept for the next day. Then transfer the mushroom mix to the hot cauliflower and asparagus, add a tbsp of ghee, butter or olive oil, mix carefully and simmer for another 1 minute , so everything is nice and hot. Season with salt and pepper to taste and add more parsley if desired.
To serve start with a bed of rocket on each plate, scoop the cauliflower mushrooms and asparagus risotto on top and garish with parsley, thyme and macadamia or Parmesan cheese. I love a side of purple sprouting broccoli with melted ghee and a pinch of Himalayan or sea salt to go with this dish.
Bon Appetite !!
Homemade Kimchi
I hope you all had a lovely first month of the year and are looking forward to getting closer to spring, without wishing time away, of course! This month’s post comes in two parts, the first part is a homemade Korean Kimchi, which kind of… Read more
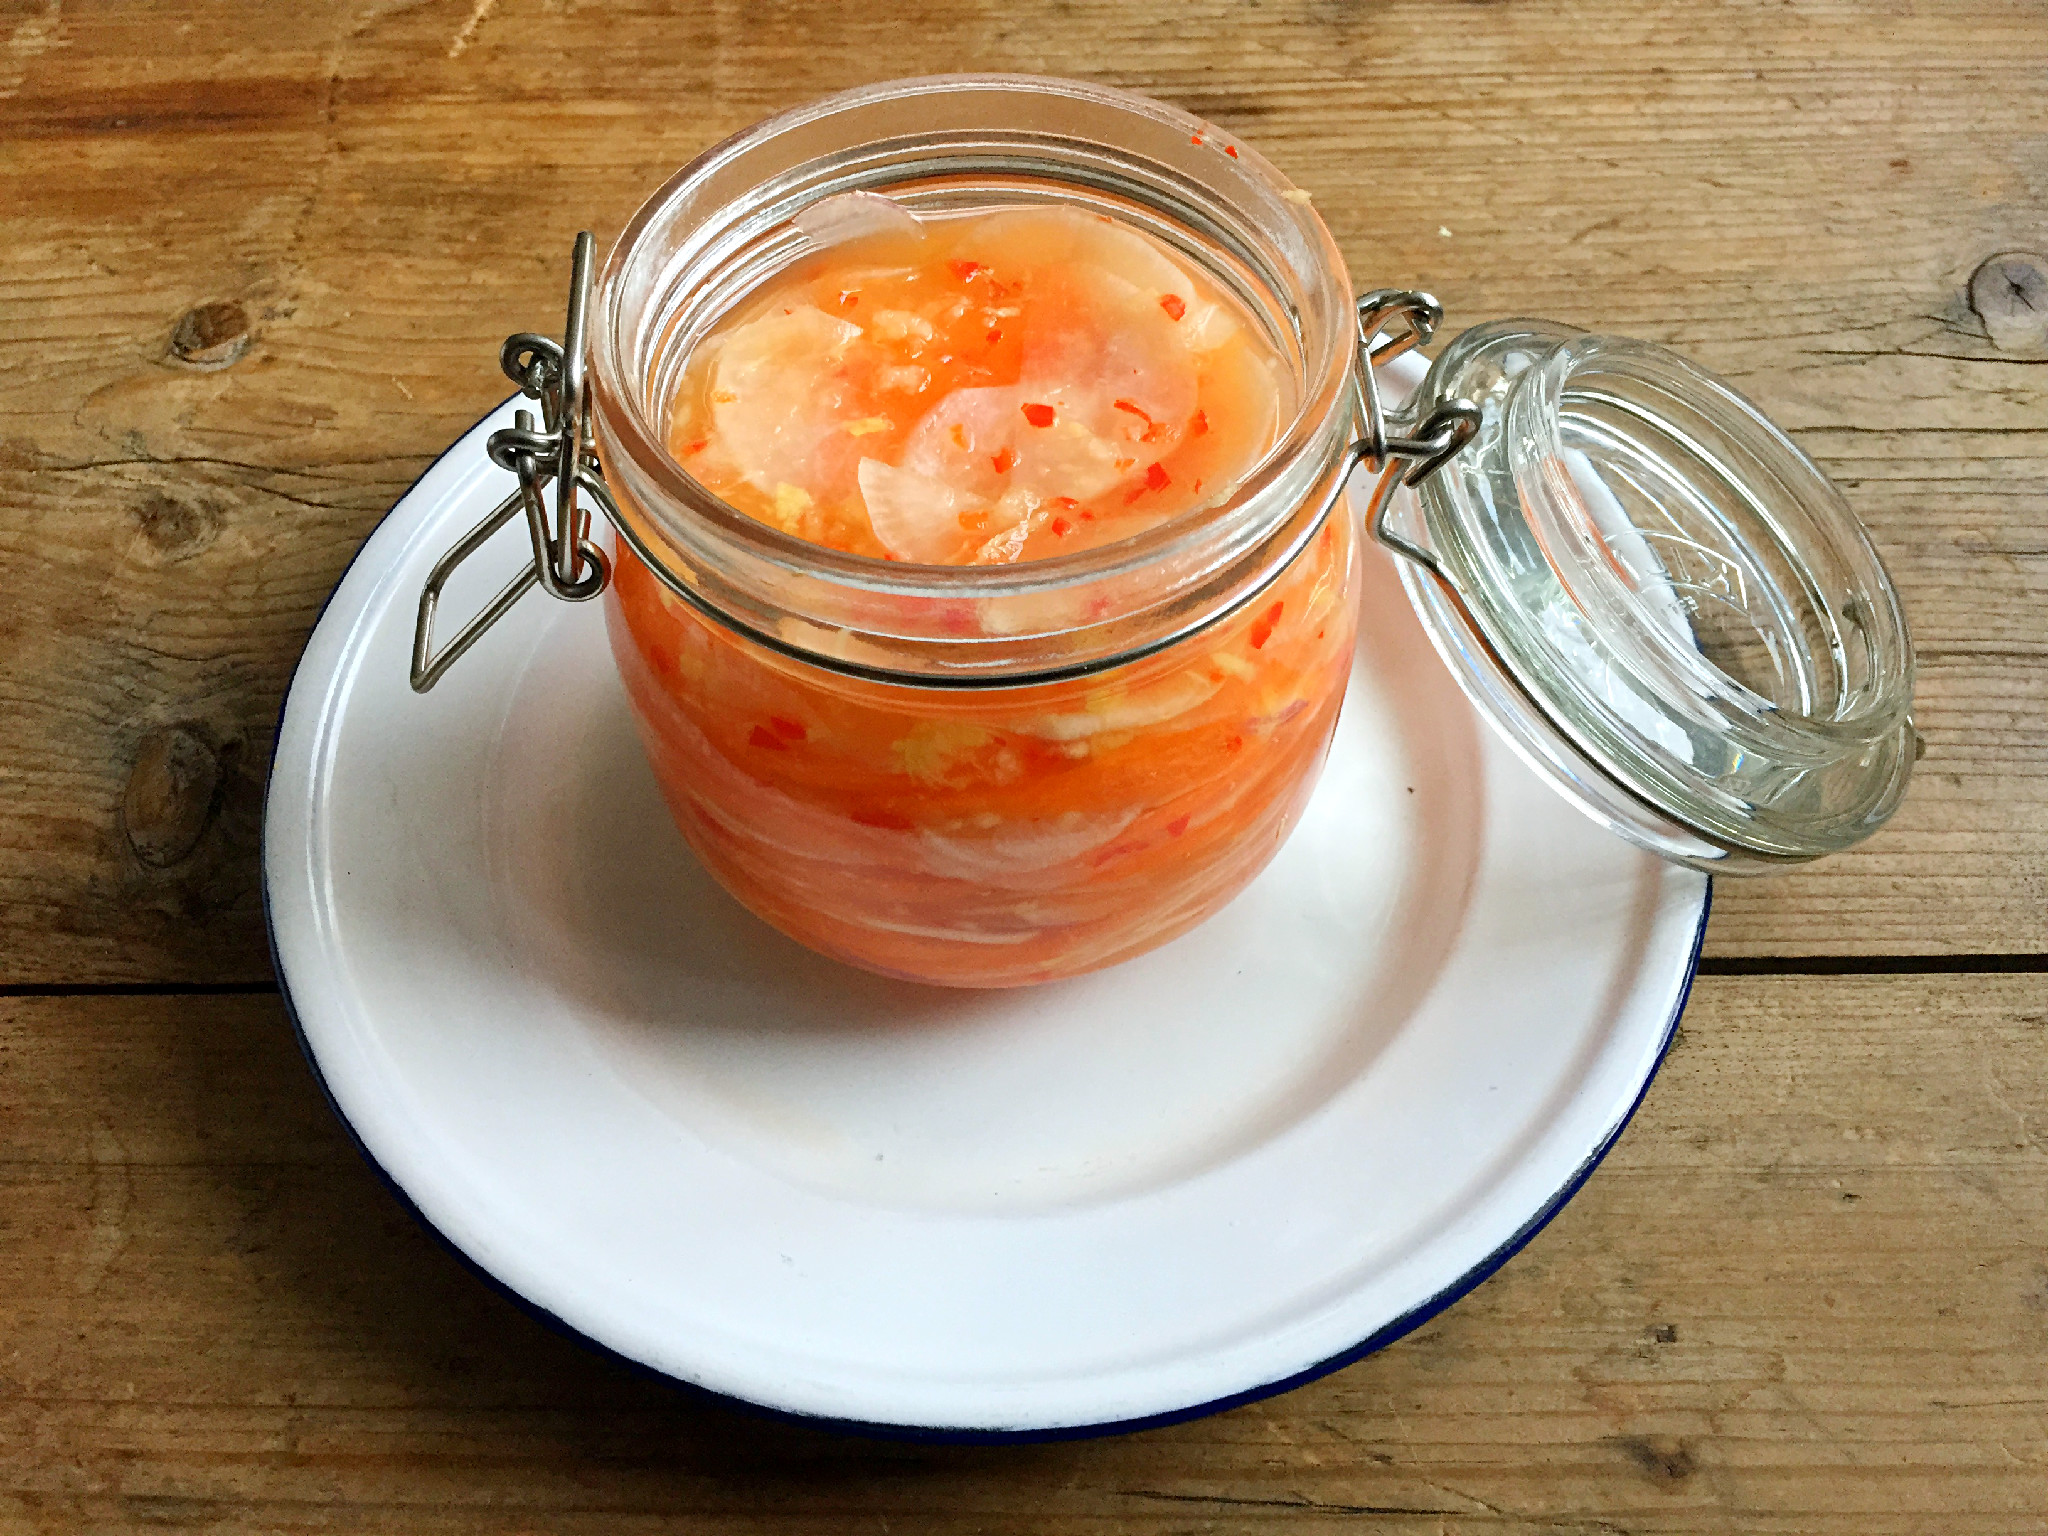
Homemade Kimchi – makes 1 medium sized Kilner Jar
Organic ingredients:
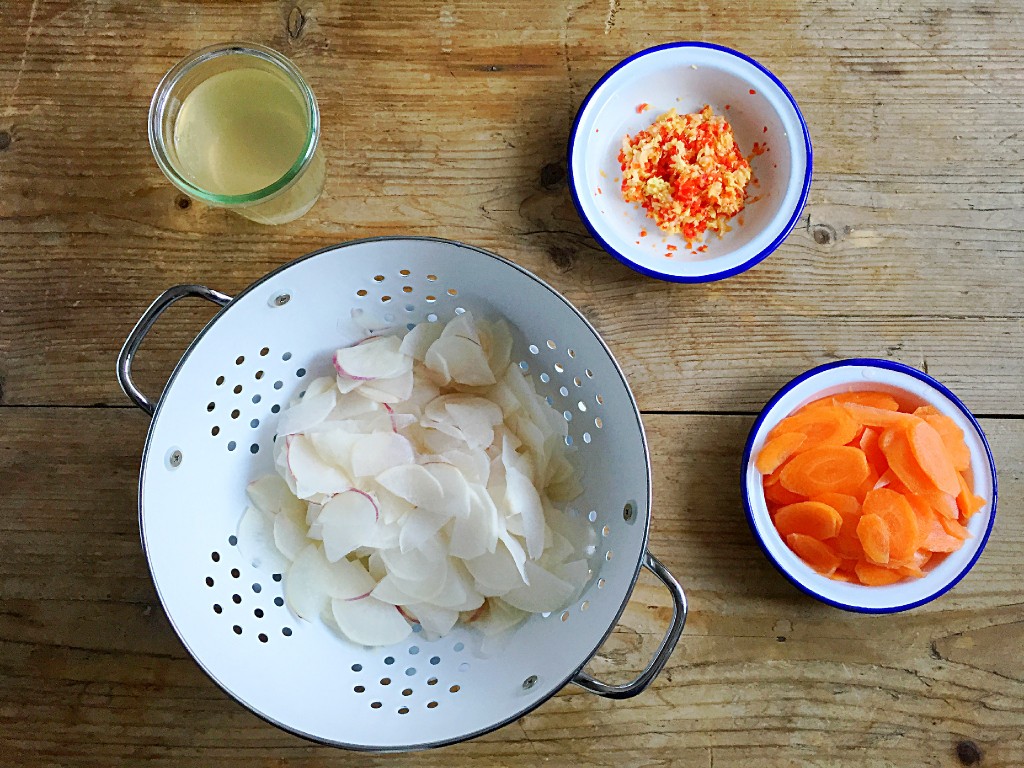
1 small Chinese cabbage ( roughly chopped)
OR
4 small carrots (finely sliced)
4 medium sized turnips ( finely sliced)
Kimchi paste:
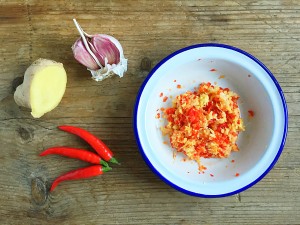
3 cloves of garlic (grated)
2 chilies, finely chopped ( remove seeds to control heat)
3 tablespoons of freshly grated ginger
1 tsp of sesame seeds ( optional)
750-1000ml brine ( mix 2 tbsp of sea salt with 750ml filtered water)
Method:
Mix salt and water in a bowl and set aside, then peel and very finely slice the carrots and turnips or if using cabbage, roughly chop, add to the salt water , making sure the vegetables are well covered in salt water and leave to soaks over night. A tip for slicing the carrots and turnips: You can get very fine stings rather than slices by using a peeler, it looks great and is super quick and easy.

Prepare the Kimchi paste by blending the garlic, ginger and chili together, put in a jar and store in the fridge until the next day.
The following day, drain the soaked vegetables, keeping the brine as you may need to add some at the end. Check the vegetables for taste, if they taste too salty, rinse with water once. Next mix the drained vegetables with the Kimchi paste, mix well to make sure the paste is well distributed.

Then take the Kilner jar and pack the vegetables tightly into the jar, one layer at a time, pressing down layer for layer. The brine will start rising slowly, keep on packing and pressing down the layers, leaving two inches at the top. It is important that the vegetables are covered with rising brine, so add some of the left over brine if needs be for the vegetables to be well covered.

Now place a glass of water on top of the vegetables to press them down, put the jar on a plate, as rising brine might spill over the top during the fermentation process. Cover with a towel and leave to ferment in a warm place for 5-7 days.

Check daily to see where the fermentation process is at, you will see bubbles rising, this is a sign that our little helping bacteria are hard at work. Press the glass down to release some of the air, which helps to speed up the process a little. Once the bubbles stop showing, usually after a week, close air tight and store in the fridge until serving.

Try with Irma’s gluten free summer rolls or watch out for next week’s chicken broth pho served with Kimchi…..
Bon Appetite !

Sprout your way through till Spring
Around this time of the year I love taking advantage of home sprouting, it’s such a good way to bring freshness to your plate. You can almost sprout any seeds or pulses, as well as some nuts. The idea of sprouting is to increase mineral… Read more
 Lentil, chickpea and alfafa sprouts
You can get the dry beans and seeds from the supermarket and most organic shops or green grocers should have some. Organic is always better and not that much more expensive. And here is how it works:
1. Place a handful or two of seeds into a bowl , fill with water until covered and leave to soak over night. Ideally use filtered water.

2. The next morning, rinse well with filtered water and drain using a sieve, then place seeds back in the bowl, this time without adding water.

3. Leave covered or uncovered throughout the day, avoiding direct sunlight and repeat rinsing process in the evenings and mornings. Keeping the seeds moist and at room temperature will encourage them to start sprouting.

4. After 2-3 days small tails should start showing . Once the tails are well visible, they are ready to be eaten and will keep in and air tight container in the fridge for around 3-4 days. The cool temperature in the fridge will prevent them from sprouting further. Sprouts go really well on top of salads, soups, as sandwich fillings or eaten as a snack. In fact you can just sprinkle some freshness onto any lunches and dinners of your choice! For example I topped my kale & red cabbage salad with some alfafa sprouts today.

Bon appetit !

Gluten free multi-seed bread
It is already day 5 but I think I can still say ‘Happy New Year’!! For many of us the New Year starts with some sort of detox . I have chosen to give up alcohol, coffee and gluten for a month. Coffee is probably… Read more
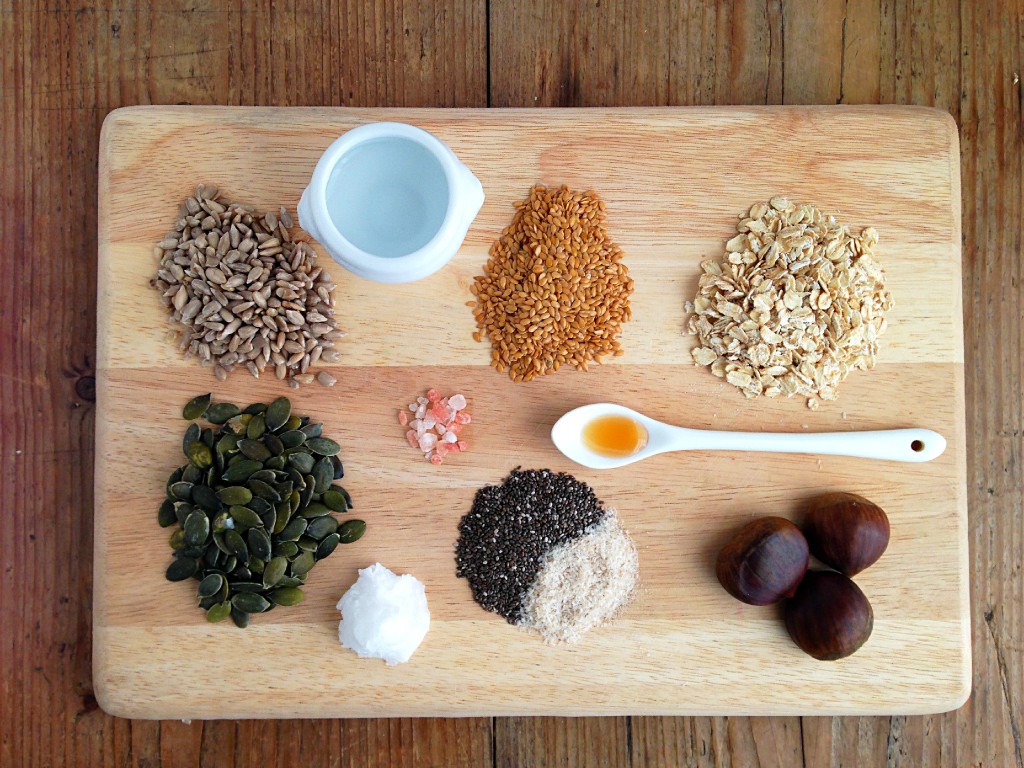
Gluten free multi-seed bread – makes 2 small loafs
90g sunflower seeds
45g pumpkin seeds
90g linseeds
65g chestnuts; almonds or hazelnuts
145g oats ( make sure they are packed in a gluten free environment)
4 tbsp psyllium husk
2 tbsp chia seeds
1 tbsp of maple sirup or date sirup
3 tbsp of coconut oil
1 tsp of ground Himalayan salt
350ml of slightly warm water
Chop the baked chestnuts into small pieces or cut in half and thinly slice them, mix all dry ingredients together in a bowl; then whisk together sirup, oil and water until oil is dissolved and add to the dry ingredients; stir with a wooden spoon until you get a nice texture (its not dough like, its more like a thick but smooth porridge) . If the mix seems to dry add a little more water. Prepare small bread baking pans with baking paper, that way the the bread won’t stick to the pan. I even use the baking paper on non sticky pans, safes washing up and I try and re-use the paper. Add the bread mix to the pans and leave covered at room temperature for at least two hours, even better over night.

Once the mix has rested, preheat the oven at 175c and bake for 20minutes, then take the bread out of the pan and put upside down on baking tray, using baking paper to keep everything clean.
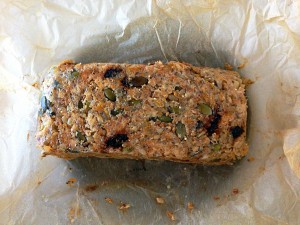
Put the ‘upside down’ bread loafs back in the oven and bake for another 30-40 minutes. The bread is ready if it sounds ‘hollow’, when gently tapping on the top.

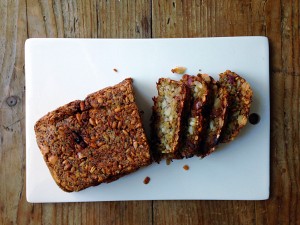
Leave the bread to cool before cutting and eating it . The bread keeps in the fridge for 3-5 days. I usually slice it and put in the freezer, so I can have it fresh when ever I fancy it. It works well going straight from freezer in the toaster. Top with your favourite bread toppings , mine include cheese & pickle, mushroom pate, hummus, ghee & a sprinkle of salt, honey, marmalade or avocado & spring onions with a little bit of tamari sauce. Just too good!